HR_OM11_PP01 Create Cost Distribution - Position (PP01)
Purpose
Authorized users in a department or business area
responsible for maintaining position cost distribution information in SAP will
use this transaction. The Cost Distribution infotype (1018) is equivalent to
HRS screen 063. It sets up the cost distribution at the position level. When
a new position is created, the cost distribution is set to 100%. If multiple
accounts are to be charged, create those new records through this transaction
and provide the effective dates for the distribution to each cost object.
Trigger
The cost distribution needs to be updated or further
distributed for a position.
Prerequisites
None
Menu Path
Use the following menu path(s) to begin this transaction:
Transaction Code
Helpful Hints
Unless overridden at the employee-level, the position's cost
distribution will be charged for payroll-related costs for the incumbent in the
position. Therefore, based upon start and end dates, the cost distribution
percentages for any given time period should always add to 100% to ensure
correct charging occurs.
Procedure
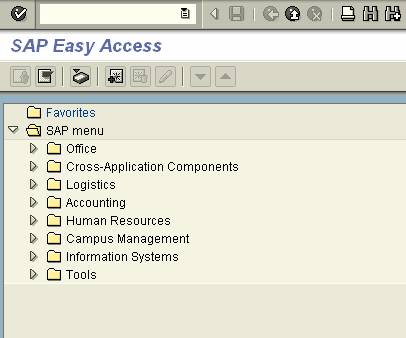
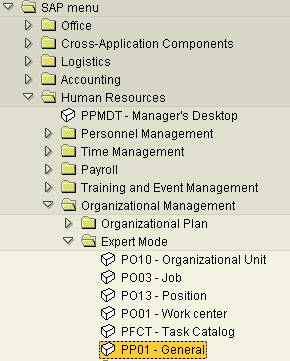
1. Start
the transaction using the menu path below or enter the transaction code, PP01,
in the transaction window: SAP Menu → Human Resources → Organizational Management
→ Expert Mode → General.
SAP Easy
Access
Maintain
object
 On the Maintain Object screen, the Plan
version should display as 01 Current Plan.
On the Maintain Object screen, the Plan
version should display as 01 Current Plan.
2. Click in the Object Type field, then click the Possible values box, , to the right of that field.
Select
, to the right of that field.
Select  as the Object Type
value.
as the Object Type
value.
3. As required, complete/review the following fields:
|
Field Name
|
R/O/C
|
Description
|
|
Object ID
|
R
|
Description of the Object ID.
Example: Staff
Support Associate II
|
4. Click in the Object ID field, then click the Possible entries icon,  , for that field to locate the
Position in the Organizational structure..
, for that field to locate the
Position in the Organizational structure..
Choose
Position
5. Click  .
.
Choose
Position
6. Click  .
.
Choose
Position
7. Double-click  as the position for
this example.
as the position for
this example.
Maintain
object
Notice that the selected position has
populated the Object ID field.
8. If the Active tab is not the tab being displayed, click on the Active tab.
9. In the Infotype Name list click the scroll icon,  , to locate the Cost Distribution infotype.
10. Click  to highlight and select
it.
to highlight and select
it.
11. In the Time Period portion of the screen, complete the following fields:
|
Field Name
|
R/O/C
|
Description
|
|
From
|
R
|
The effective begin date for the cost distribution
Example: 12/15/2005
|
|
To
|
R
|
The end date of the cost distribution
Example: 12/31/9999
|
If the end date is unknown, leave the value
at 12/31/9999.
12. Click the Create icon,  .
.
Create
Cost Distribution
13. In the Cost Distribution detail lines, as required, complete the following
fields:
|
Field Name
|
R/O/C
|
Description
|
|
COAr (Controlling Area)
|
R
|
The Controlling Area of the cost object
Example: UK00
|
|
Cost ctr
|
R
|
The Cost Center number to be charged
Example: 1012037060
|
14. To locate the correct cost center, click in the Cost Center field, then click the
Possible entries icon,  .
.
Cost Center (1)
Cost Centers may be located through various
search option tabs and fields.
15. To
search by the Cost Center short text (on the Cost Center tab), complete the
following field:
|
Field Name
|
R/O/C
|
Description
|
|
Cost Ctr Short text
|
R
|
Cost Center short text
Example: *human*
|
You can use an asterisk (*) before, in the
middle of, or after partial values. In this example we want to find the
appropriate cost center in Human Resources Services, so the entry of *human*
will result in any values with the term, human, somewhere in the short text.
16. Press Enter or click  .
.
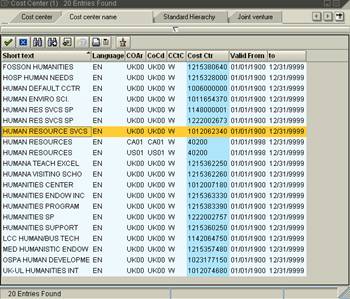
Cost Center (1) 20 Entries Found
17. Double-click  for this example.
Create
Cost Distribution
18. As required, complete the following field:
|
Field Name
|
R/O/C
|
Description
|
|
Pct.
|
R
|
The percentage of cost to be charged to this cost
center
Example: 70
|
19. On the second row of the Cost Distribution line items, as required, complete the
following fields:
|
Field Name
|
R/O/C
|
Description
|
|
COAr
|
R
|
Description of the Controlling Area
Example: UK00
|
|
Cost ctr
|
R
|
The next Cost Center to be charged
Example: 1012037060
|
|
Pct.
|
R
|
The percentage of cost to be charged to this cost
center
Example: 30
|
Important: Notice that the
percentages of this cost distribution (70% and 30%) add to 100%, which is
essential.
20. Click  .
.
CostDistribution
Create
 A cost distribution record already exists
even for new positions which are created with one cost center at 100%.
Therefore, you will get a message asking whether to delete or delimit the
previous record. If the dates on the new cost distribution are the same as or
prior to those on the position, you will be asked about deleting the previous
information. If the dates are later, however you will be asked about
delimiting (end-dating) the previous record in conjunction with the dates on
the cost distribution just created.
A cost distribution record already exists
even for new positions which are created with one cost center at 100%.
Therefore, you will get a message asking whether to delete or delimit the
previous record. If the dates on the new cost distribution are the same as or
prior to those on the position, you will be asked about deleting the previous
information. If the dates are later, however you will be asked about
delimiting (end-dating) the previous record in conjunction with the dates on
the cost distribution just created.
21. Click  .
.
22. You
have completed this transaction.
Result
You have updated the cost assignment for the position.
Comments