Procedure
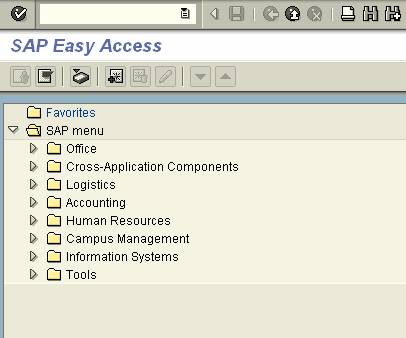
1. Start the transaction using the menu path below or enter the transaction code, PP01, in the transaction window: SAP Menu → Human Resources → Organizational Management → Expert Mode → PP01 - General
|
|
|
|

2. As required, complete the following fields:
|
Field Name |
R/O/C |
Description |
|
Object type |
R |
Description of the Object type. Example: Job |
|
Object ID |
R |
Description of the Object ID. Example: 40500048 (ID for Nurse Midwife) |
3. In the Object ID field, click on the possible entries icon, ![]() , to search for the particular object (job
in this example).
, to search for the particular object (job
in this example).
|
|
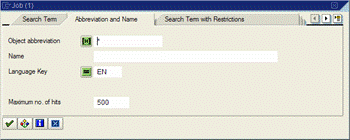
4. In the Job search window, click on the Abbreviation and Name tab. Complete the following field:
|
Field Name |
R/O/C |
Description |
|
Name |
R |
Enter the job name or partial name using the *. Example: *nurse* |
|
|
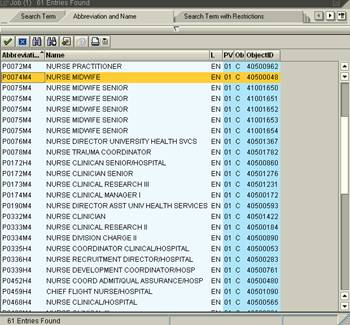
5. Double-click ![]() , in this example.
, in this example.
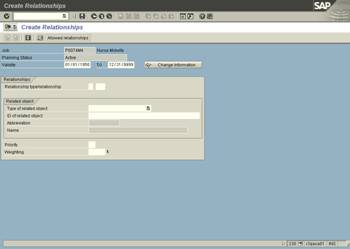
6. Press Enter. Information from the selected job is populated.
|
|
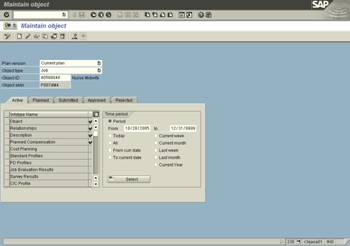
7. On the Active tab, in the time period section, make sure the period radio button is on (i.e., darkened). Complete the following field:
|
Field Name |
R/O/C |
Description |
|
From |
R |
The starting date for this action Example: 01011950 |
8. In the Infotype Name list, click on the gray box preceding the Relationships
infotype to highlight this line, ![]() .
.
9. Click the Create infotype icon, ![]() ,
in the application toolbar.
,
in the application toolbar.
|
|
10. In the Type of related object field, click on the ![]() icon in that field. Click
icon in that field. Click ![]() .
.
11. As required, complete the following field:
|
Field Name |
R/O/C |
Description |
|
Relationship type/relationship |
R |
Description of the Relationship type/relationship. Example: BZ01 (for Shift Differential) |
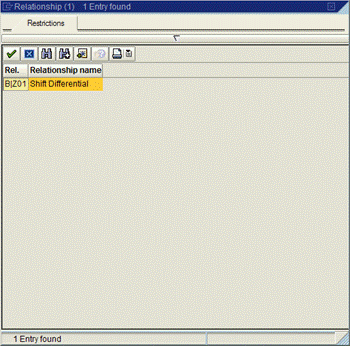
12. Click in either of the two fields following Relationship type/relationship.
Click the possible entries icon, ![]() , for valid values.
, for valid values.
Relationship (1) 1 Entry found
|
|
|
|
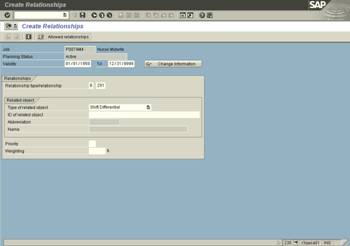
14. As required, complete the following field:
|
Field Name |
R/O/C |
Description |
|
ID of related object |
R |
Description of the ID of related object. Example: 12 |
15. Click in the ID of related object field, then click the possible entries icon, ![]() , to search.
, to search.
|
|
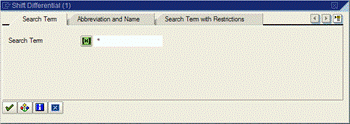
16. In the Shift Differential search window, click ![]() to view all values.
to view all values.
Shift Differential (1) 17 Entries Found
|
|
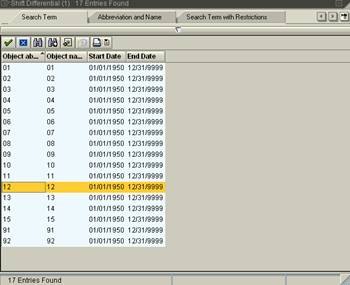
17. Select and double-click the line,![]() ,
in this example.
,
in this example.
|
|
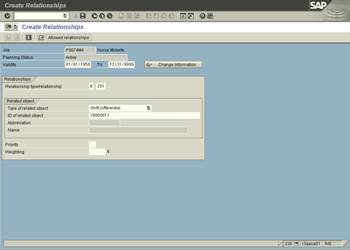
18. Press enter. If all information is accurate, click ![]() to save this entry. This will relate the selected
shift differential to the job of Nurse Midwife.
to save this entry. This will relate the selected
shift differential to the job of Nurse Midwife.
19. You have completed this transaction.
You have created a new relationship by adding a specific shift differential value to a specific job (object).
Comments